
Step 1: Login in to KPFA website
a. Go to kpfa.org/login
b. Use the “sign in with google” button.
c. Login using your KPFA email and password You should see this screen, called the Dashboard.
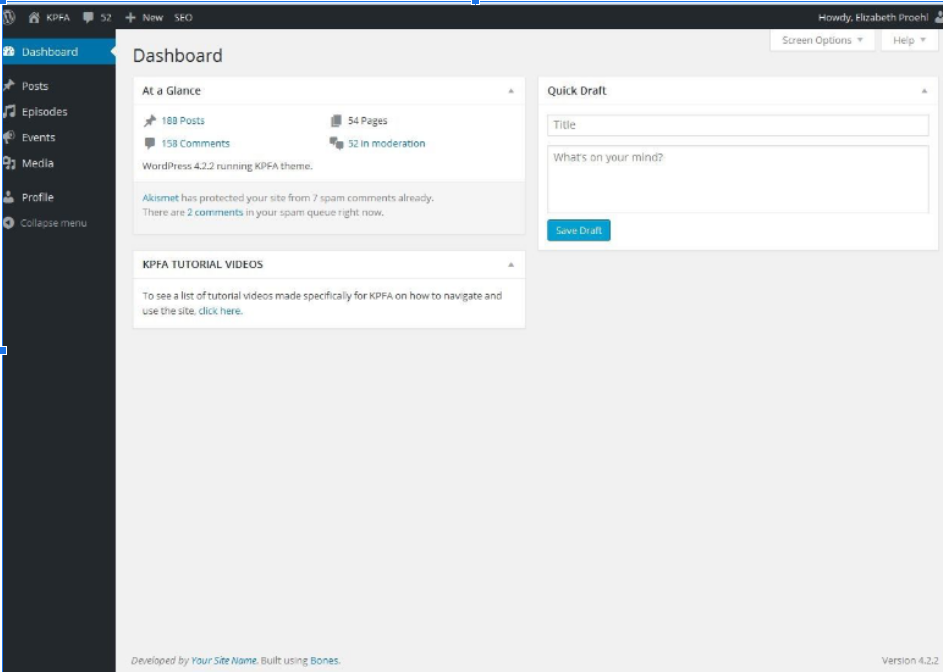
Step 2: Navigate to the episode section
a. On the left side of the screen, a dark gray bar shows Posts, Episodes, Events etc.
b. Move the cursor over “Episodes.” Another small menu should pop up.
c. Click “All Episodes.”You should see this screen:
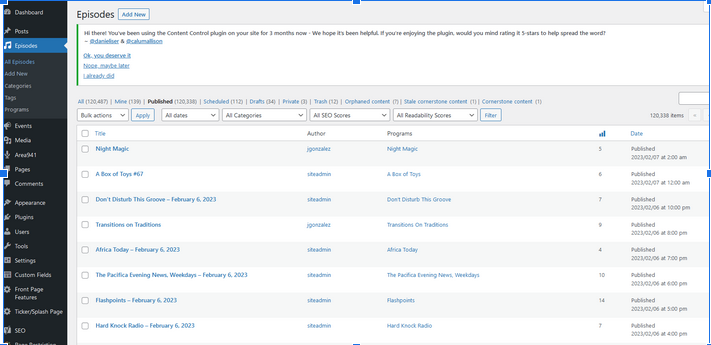
Step 3: Create the episode
Click the “add new” button in the upper left corner next to “Episodes.”
Step 4: Complete the episode info
a. Fill out the title and description of the episode as you normally would.
*NOTE YOU MUST FILL THIS OUT IT IS NOT DONE AUTOMATICALLY WITH EPISODES THAT ARE MANUALLY SCHEDULED.
On the right hand side you will see some boxes; these have info that must be changed in order for the episode to be published correctly and link to the correct audio.
b. In the box labeled “Categories,” click “Featured Episode.”
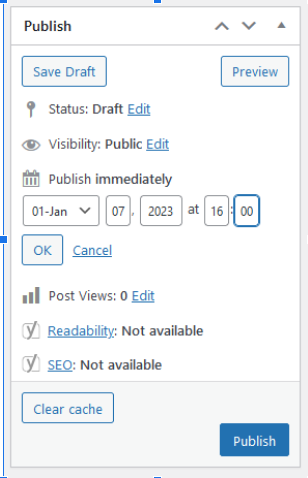
c. In the box labeled “Publish,” navigate to where it says “Publish immediately” and click “Edit” (to the right). Fill out the time and date that your episode started or will start, using 24-hour formatting for time.
d. Confirm the date and time are correct, and then click “OK.”
The example below would publish an episode backdated to January 7 at 4pm (16:00) and would include whatever audio was on air at that time.
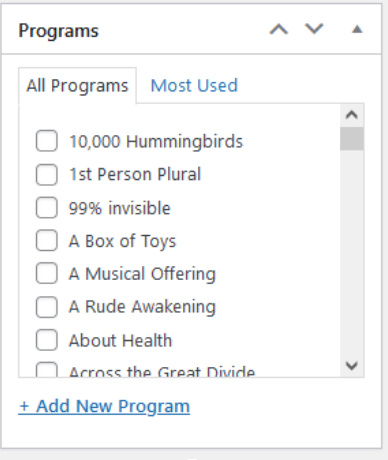
e. In the box labeled “Programs,” scroll down until you find your show. Make sure the box is checked. This will place the show in the correct places on the website, as well as post the show’s rss feeds to the correct providers (such as apple podcasts).
Step 4: Publish
Now that the time of the show is correct and you have selected your program from the list, go back to the “Publish” box and click the blue “Publish” button.
If you are working on an old episode, it will be available as soon as the page is done loading. If you are scheduling a future show, it will be published at the date and time you confirmed in Step 3.d (above).